E-invoice Creation and Status Determination
e-Invoicing (Electronic Invoicing) does not mean generating a PDF invoice. It is a system where B2B (Business-to-Business) invoices are electronically uploaded to the GST Network (Government Portal) for authentication.
Once authenticated, the government system returns two critical pieces of data that must be printed on your invoice:
- IRN (Invoice Reference Number): A unique 64-character hash string.
- QR Code: A machine-readable code containing invoice details.
Understanding E-invoicing and its Benefits
E-invoicing is a system where invoices are electronically authenticated by a government portal before they are issued to the buyer. This helps to:
- Reduce Tax Evasion: Prevents fraudulent activities and improves tax compliance.
- Improve Interoperability: Ensures standardization and interoperability between different accounting systems.
- Reduce Errors: Minimizes data entry errors and automates invoice processing.
- Improve Efficiency: Streamlines the invoice creation and payment process.
- Real-time Tracking: Allows for real-time tracking of invoices and payments.
Prerequisites for E-invoice Generation in Zoho Books
Before you can start generating E-invoices in Zoho Books, you need to ensure that the following prerequisites are met:
- GST Registration: You must be registered under GST and have a valid GST Identification Number (GSTIN).
- Zoho Books Setup: Your Zoho Books account must be properly configured with your GSTIN, company details, and item details (including HSN codes).
- E-invoice API Integration: You need to integrate Zoho Books with the Invoice Registration Portal (IRP) through API. This typically involves obtaining API credentials from the IRP and configuring them in Zoho Books. The specific IRP (Invoice Registration Portal) depends on the country implementing e-invoicing.
- Accurate Customer Details: Ensure that your customer details in Zoho Books are accurate and complete, including their GSTIN (if applicable) and billing address.
Enabling E-invoice Integration in Zoho Books
The steps for enabling E-invoice integration in Zoho Books may vary depending on your version and location, but the general process is as follows:
- Navigate to Integrations: Go to “Settings” (usually represented by a gear icon) and then look for “Integrations” or “E-invoice” or “GST e-invoice.” The exact path could be: Settings -> Integrations -> GST e-invoice.
- Enable E-invoice Integration: Find the option to enable E-invoice integration and toggle it “On.”
- Enter API Credentials: You will be prompted to enter your API username, password, and Client ID, which you obtain from the designated Invoice Registration Portal (IRP). This is usually a one-time activity.
- Configure Default Settings: You may be able to configure default settings, such as the default transporter, mode of transport, and other relevant details.
- Save Settings: Save the changes
E-invoice Creation Process in Zoho Books
Once the E-invoice integration is enabled, you can generate E-invoices directly from your sales invoices in Zoho Books.
- Create a Sales Invoice: Create a sales invoice for the transaction. Ensure that the invoice includes all the required information, such as customer details, item descriptions, quantities, prices, HSN codes, GST rates, and place of supply.
- Check E-invoice Applicability: Zoho Books may automatically determine whether an E-invoice is required based on the customer’s GSTIN and the invoice value. If not, verify if it’s applicable as per prevailing rules.
- Generate E-invoice: If an E-invoice is required, look for an option to “Generate E-invoice” or “Create E-invoice” on the invoice. This button or option will initiate the process.
- Review and Submit: Review the data pre-populated for E-invoice generation to ensure accuracy. Click on submit button to generate the IRN.
Key Fields Required for E-invoice Generation
Ensure that the following key fields are correctly entered in your sales invoice before generating the E-invoice:
- Supplier GSTIN: Your GSTIN.
- Customer GSTIN: The customer’s GSTIN (if applicable).
- Invoice Number: A unique invoice number.
- Invoice Date: The date of the invoice.
- Item Details: Description of goods or services. HSN Code (Harmonized System Nomenclature code) for the item. Quantity. Unit Price. Discount (if applicable). GST Rate.
- Place of Supply: The state or union territory where the supply is made.
- Transportation Details (if applicable): Transporter Name. Transporter ID. Mode of Transport (Road, Rail, Air, etc.). Vehicle Number. Distance.
Zoho Books will automatically store the IRN and update the invoice with the QR code. The QR code should be printed on the invoice for verification purposes.
Determining E-invoice Status
Zoho Books also allows you to check the status of your E-invoices to ensure that they have been successfully generated and validated by the IRP. After generation, the status will typically show up in the invoice screen itself.
- Navigate to Invoices Section: Access invoices to check.
- Check Status in column: You will find a column displaying the status of the invoice, this includes whether an IRN was generated or the invoice is pending to be submitted for IRN generation.
- Possible statuses: Statuses shown are based on Zoho Books’ actual interface and integration status. Always check with the latest version. Some statuses are: generated successfully, failed to generate, Pending, etc.
Associate IRN Manually
When you push an invoice directly to the e-Invoice Portal, the Invoice Registration Portal (IRP) will generate a unique Invoice Reference Number (IRN), Acknowledgment Number and Acknowledgment Date for each successfully submitted transaction.
You can manually associate the IRN details issued by the IRP to the invoice that you’ve created in your Zoho Books organisation. Here’s how:
- Go to Sales on the left sidebar and select Invoices.
- Select the invoice to which you want to associate the IRN details.
- Click the More icon at the top of the invoice’s details page and select Associate IRN Details from the dropdown.
- Click Associate IRN Manually in the pop-up that appears.
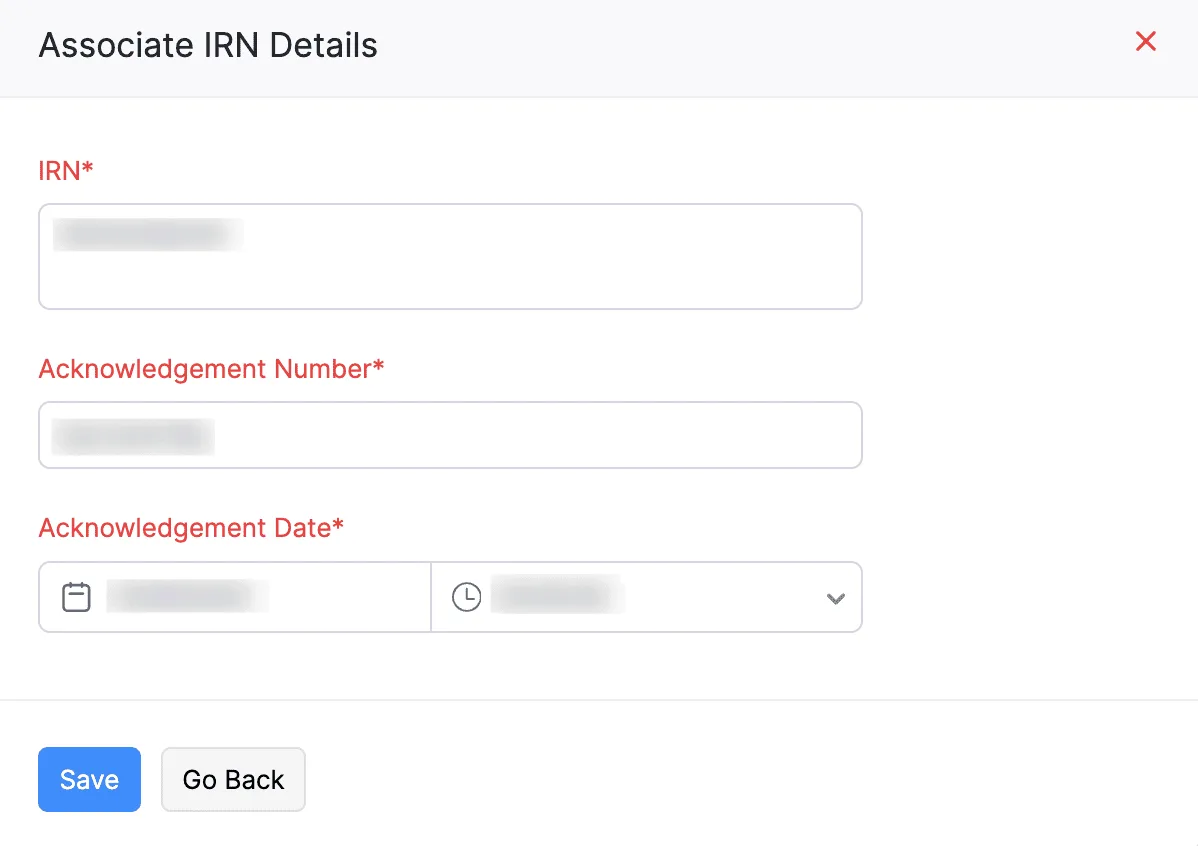
- In the pop-up that appears, enter the IRN, Acknowledgement Number, and Acknowledgement Date.
- Click Save.
The e-Invoice’s status will be changed to , and the IRN details associated with the e-Invoice will be displayed at the bottom of the transaction PDF.
Cancelling an e-Invoice within 24 hoursIf you cancel an e-Invoice in Zoho Books within the first 24 hours of generating an IRN for it, then it will be cancelled in the IRP also automatically.To cancel an e-Invoice:Go to Sales on the left sidebar and select Invoices.Select the e-Invoice that you want to cancel.Click the Cancel e-Invoice button.Select the Reason for Cancellation.Enter the Remarks.Click Cancel e-Invoice.
Summary Table: E-invoice Creation and Status Determination
| Step | Description |
|---|---|
| 1. Setup Prerequisites | Ensure you have GST registration, Zoho Books setup, E-invoice API integration, and accurate customer details. |
| 2. Enable E-invoice Integration | Enable the E-invoice integration feature in Zoho Books settings. |
| 3. Create Sales Invoice | Create a sales invoice in Zoho Books for the transaction. |
| 4. Generate E-invoice | Generate the E-invoice from the sales invoice, reviewing and submitting the data. |
| 5. Print/Download IRN and QR Code | Print the invoice with the generated QR Code. |
| 6. Monitor E-invoice Status | Verify E-invoice status within the invoicing module in Zoho Books |